InstantPot Lasagna Soup

Last night we tried a new recipe and am so glad that we did! The recipe made a pot full and we have plenty leftover for lunches in the next several days. Its simple enough for a weeknight dinner but I think would be great to serve guests! All of the flavors of traditional lasagna in a simple one pot soup recipe!

I used Italian sausage but next time I will use ground beef because that’s what I normally use in my lasagna.

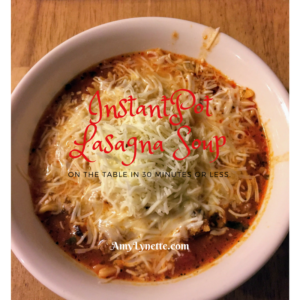
The cheese mixture on the bottom was my favorite part! So creamy and delicious.

[recipe title=”InstantPot Lasagna soup” servings=”6-8″ time=”30 mins” difficulty=”Easy”]

[tx_row]
[tx_column size=”1/2″]

1 pound ground beef or Italian sausage

1/2 onion, chopped

1 stalk celery, chopped

24 ounce jar tomato, garlic, and basil pasta sauce

14 ounce can diced tomatoes with the juice

7 cups tomato bouillon, can sub chicken

12 ounce box of radiatore or bowtie pasta

[/tx_column]
[tx_column size=”1/2″]

1 bay leaf

2 tsp oregano

1/2 tsp dried basil

1 tsp seasoned salt

8 ounces sour cream

8 ounces cream cheese

2 cups Italian cheese blend, or your favorite cheese such as mozzarella or Parmesan

[/tx_column]
[/tx_row]

Place your sour cream and cream cheese in a small bowl, with a dash of salt, and allow them to come to room temperate so you can combine them to use with your finished soup. Set aside.

Turn your pot on saute, normal function and add a tsp of oil and once it displays HOT, swirl the pot around to coat the bottom with the oil. Add in your meat, onion, and celery. Break the meat up and saute(7-8 minutes) until most of the pink is gone. Drain the fat off of the meat, then add in the sauce, tomatoes, bouillon, uncooked pasta, and the seasoning. Do not add the sour cream mixture now!

Give the soup a good stir, check your seal, put on the lid and lock it, and put the value in the seal position. Cook on high pressure for 5 minutes! While it’s cooking, give your sour cream mix a good stir and place a hefty spoonful into your serving bowls. Do a quick release once your 5 minutes is finished. Open the lid carefully and set aside. Ladle the hot soup into your bowls that have the white mix in the bottom and top with a generous portion of the Italian cheese blend. Enjoy!

[/recipe]

Try it out and let me know what you think!


New to the world of InstantPot and pressure cooking? Check out my review here!

InstantPot Review: Be brave and get one

This Mama bought herself a new toy recently after reading many posts, recipes, and pins about how incredible the InstantPot was! I have a friend who has one, and she uses it regularly and has nothing but great things to say about it!  I spotted them in the stores and looked at them several times. But I kept changing my mind last minute because it was a good chunk of change to drop on a new kitchen appliance.

I browsed Amazon and other shops looking at reviews and prices. Over and over people loved it once they actually took it out of the box and used it. Many people admitted to having one but they stay untouched because they were afraid to use them! They do cook under a very high amount of pressure and that can be scary but I have used a pressure canner before and didn’t blow up anything.  I felt confident I could do it.

You see, I am one of those moms who rarely buys things for herself, because child one needs this or child 4 would like new those. The holidays are coming up. Debt needs paying off. Savings is a good thing, Amy. Excuse after excuse would flood my mind when I’d get close to making my mind up. I already have several crockpots and those are life changing to a busy family, why change up things now?

You get the picture, so buying it was a bit of an inward struggle to say Yes to the InstantPot. Finally, the kids and I went shopping and I had made my mind up that today was the day! I was gonna buy me an InstantPot. We get to the store. Sold out. OK, not meant to be. Fast forward to the next several times I am at the store. Sold out every single time! A few more weeks go by and my oldest daughter and I go check out the kitchen appliance aisle. They have one on the shelf! I knew it was gonna be mine. We loaded that bad boy into our cart and proceeded to get our groceries and went home for the fun to begin!

My daughter and I opened the box and put the pot, lid, and accessories out on the table. I read the entire user manual to familiarize myself and read many more posts on getting started. You can check out and follow my Pinterest board to find them and lots of recipes! Next we did the initial “water only” test run. I was a teensy bit scared of hot water squirting all over my kitchen and me, but I was brave and hit the button and stood back! After a few minutes I heard a bubbling, boiling sound and a stream of steam came out of the top! Nothing exploded! No ill effects! It came to pressure, and the “steaming”  begun inside my pot on the lovely water I was preparing. 2 minutes. 1 minute. Beep beep beep and my water was done! We did it! I used my pot for the first time and my confidence was boosted! I think I can rock this thing.

The next obstacle I needed to face was releasing the pressure inside so I could open the lid. QR NR. What in the world? QR is a “quick release” for when your kids are super hungry and cannot wait another few minutes before they die of starvation. You know, they haven’t eaten for three whole hours!  All joking aside,  the quick release is for most all foods besides red meat or larger cuts of meat, think Thanksgiving turkey breast! NR is “natural release” and the pot will cool down naturally and the pin on the top back of the lid will fall in about 10-15 minutes depending on how full the pot is. Each recipe should state which method of release to use or use a cheat sheet.

Finally with oven-mitted hand and my face way back from the pot, I barely tapped the pressure release handle to the side and steam came streaming up with a hiss! I did stop many times because it was a little frightening at first but the more I tapped, the more steam released and I got the hang of it. With a smile and happy heart, I grabbed the handle and turned it and it beeped to unlock the lid and my water test was complete! Hallelujah!

For dinner that night, I made perfect rice that we all loved!  Rice sounds simple enough right? It is one of the foods that has a very fine line of raw or burnt to the pan. Maybe that is just me? The pot has a Rice setting but I rebelled. This setting cooks for 10 minutes but I used the manual setting for 3 minutes. I love this site, they have great recipes and tips! Rice that easily scoops and wasn’t burnt onto the bottom!

[recipe title=”Rice the Right Way” servings=”4″ time=”15-20 mins” difficulty=”Easy”]

1 cup Jasmine rice, rinsed in fine mesh strainer

1 cup water

1 tsp chicken bullion flavoring

1 tsp coconut, olive oil, butter of your choice (optional)

Place your rinsed rice, water, and flavoring (oil) into your InstantPot and give a good stir to get it all incorporated. Close the lid and twist to lock. Listen for the tune. Push the Manual button and using the -/+ buttons, change to 3 minutes and you are done! You don’t even have to push a start button.

This recipe easily doubles or triples!


[/recipe]

Since perfecting the rice, I have added frozen cubed chicken breasts or canned chicken breasts for a fast hot lunch or dinner. We have enjoyed white chicken chili a few times, turkey breasts, roast beef, pasta, and my youngest daughters favorite, macaroni and cheese using the Slow Cook setting. Easy, delicious, and fast! What more can a mom ask for? I challenge you to be brave, and get an InstantPot. You can pick up the same one I have here at Amazon.  By buying from Amazon using this link I will get a small percentage at no extra cost to you, which will help offset the cost of hosting this website.


Crunch Top Spiced Pumpkin Bread Recipe


crunch-top-spiced-pumpkin-bread

Fall is in full swing here in the mountains! The leaves are beginning to shine with reds, golds, and bright oranges around every curve. Fall in our house always involves lots of baked goodies that include lots of pumpkin and apples. Today we made pumpkin bread but added a crunchy, crumbly topping that we love! This is a quick bread meaning no yeast or rise time, plus it and requires no fancy appliances or long list of expensive ingredients.


[recipe title=”Crunch Top Spiced Pumpkin Bread” servings=”24″ time=”15 minutes prep time plus baking time” difficulty=”Easy/Medium”]

3 cups all purpose flour

2 cups sugar

1 tsp salt

1 tsp baking soda

1 T cinnamon

1 tsp ginger

1/2 tsp cloves

1/4 tsp nutmeg

1 cup canola or similar oil

4 eggs

1 15 oz canned pumpkin

1 T vanilla extract

Crunch topping(optional)

3/4 cup all purpose flour

1/2 cup rolled oats

1/2 cup sugar

6 T cold butter, cubed

1/4 tsp cinnamon


Pre-heat your oven to 350*. Grease 4 mini loaf pans or 2 regular size loaf pans and place them on a cookie sheet to make putting them all in and getting out of the oven easier. With a whisk, mix the dry ingredients together in a large bowl until all the spices are distributed throughout.  In a separate medium-sized bowl whisk the eggs, oil, pumpkin, and vanilla until smooth. Add the wet ingredients to the bowl of dry ingredients and using a rubber spatula, combine the two until all of the flour is incorporated and you don’t see large areas of dry ingredients. Do not over mix the batter.

Divide the batter into the four mini loaf pans until they are a bit over half full. Leave room for the crunch topping if using. If not, fill the pans to 3/4 full. You probably will have some batter left if using the topping, so you can make a few muffins, put in another mini pan, or toss the remaining batter. Remember, the muffins or pan with less batter will bake faster than the full pans.

Mix the flour, oats, sugar, and cinnamon in a medium-sized bowl.  Add in your cold butter that has been cut into very small cubes to make it easier to cut into the dry ingredients. I use a fork to mash the butter into the dry ingredients making a nice crumbly looking mess in my bowl, think green pea size butter bits.   You can use a pastry blender to make it go faster if you have one.

Divide the crunch topping evenly over the mini loaf pans. I had some leftover so I didn’t overfill the load pans. Place your cookie sheet in the center of the oven and bake for 45-50 minutes until a toothpick comes out clean from the center of your loaf.  Cool in the pans for about 15 minutes then remove to a cooking rack to fully cool. Store in an airtight container.

[/recipe]

 Give it a try and let me know what you think!